Memory Maze Chipboard July DT

>> Friday, June 14, 2013


Once more with Memory Maze Chipboard, its been a busy summer so far, but enjoying the opportunities I have to just sit down and enjoy some card making. 

Look Who is 25


I was able to use some of my left over chipboard for this card, and had fun compiling the differant pieces to get the sentence I wanted. Its almost like a puzzle :) Happy Birthday to my little brother!


Celebrate

For this card I used my chipboard a few different ways. 


The first technique was actually a border mask. Instead of leaving the actual chipboard on the card, I laid the border on the card, spray misted it, and was left with a gorgeous swirly pattern that the chipboard was able to mask. Its a fun technique and saves chipboard :)


  I also spray misted the "Celebrate" arrow, and left the scallop border just plain. So many fun ways to use the chipboard!


Thanks for stopping by!


Read more...

Memory Maze BlogHop!

>> Monday, May 20, 2013

Welcome to the Memory Maze's first ever blog hop!!

If you didn't come from Erin Reed's blog or you popped upon this blog and didn't realize we were blog hopping you need to go to the Memory Maze blog and start the HOP!

We hope to inspire you to get out your chipboard or to order more wonderful designs from your local shop. You will need to comment on ALL of the blogs to be eligible for the prize. Plus some of our awesome designers are giving away a prize on their blogs as well. You will not want to miss out on the prizes. Here's what you could win from Memory Maze.


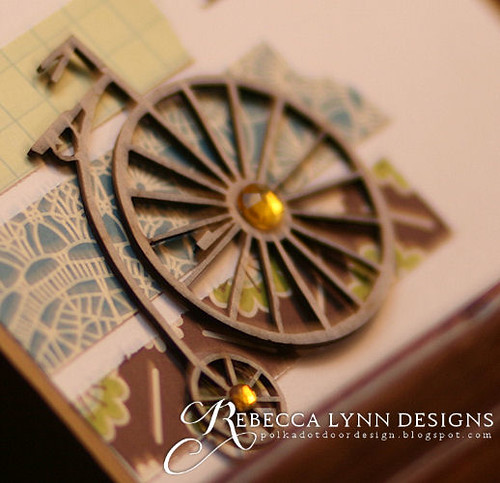
Our theme for this blog hop is Technique, each of our wonderful design team members will show you how to decorate those chipboard pieces or create new chipboard pieces.

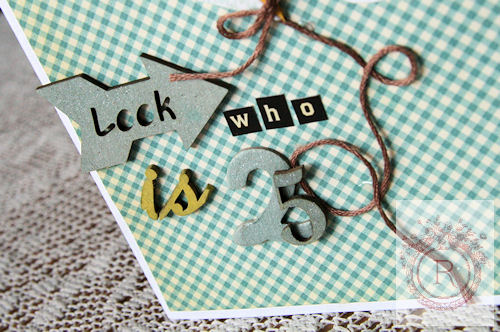
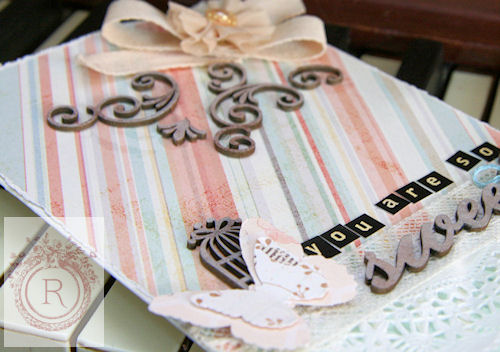
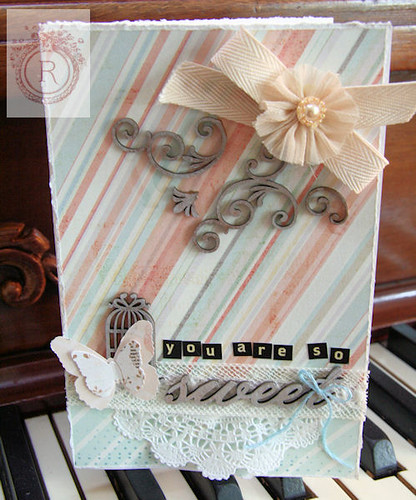
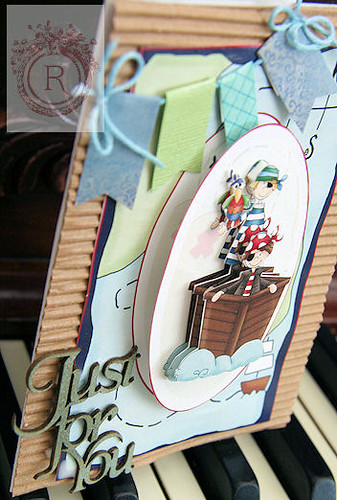
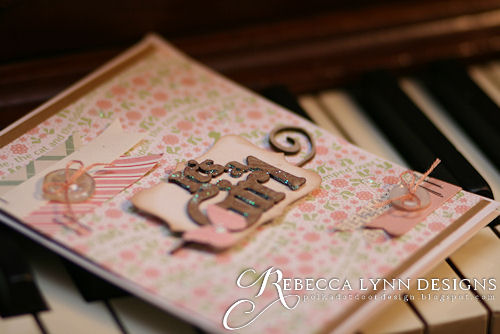
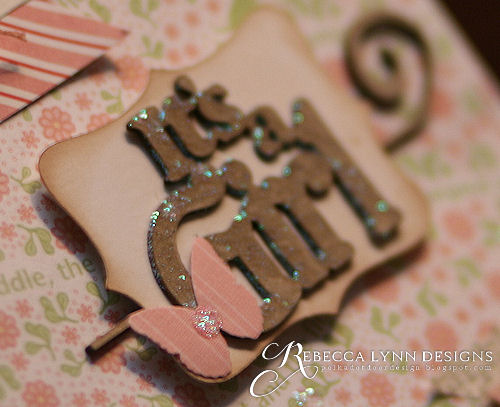
 I created a fun, sweet vintage card and wanted to show you the process I took to create the effect on the chipboard. Unfortunately the photos don't quite show off the versatility of the chipboard and how well it takes to different techniques, but its fabulous!


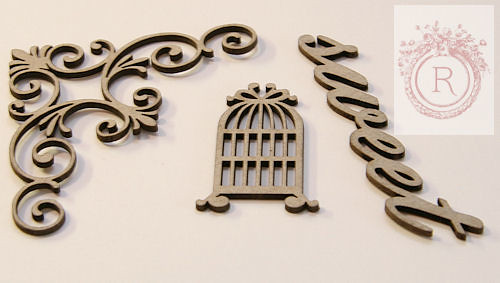
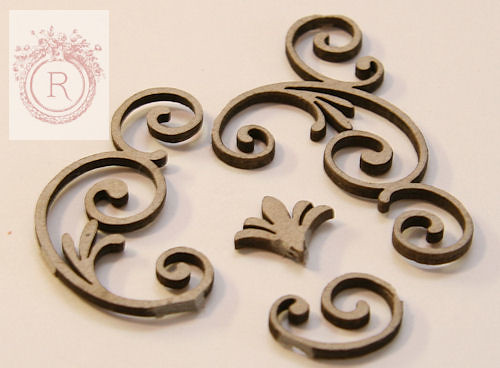
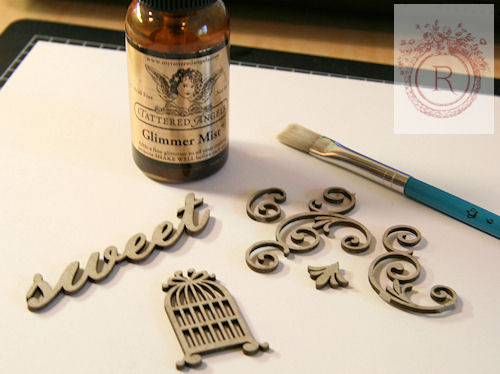
 I started off with these three pieces of chipboard, corner scroll, birdcage, and "sweet".


Before I did anything else, I decided the corner piece wasn't quite the shape I wanted, so usin an exacto knife, I along some of the lines and ended up with this fun, custom scrollwork! The chipboard is easy to cut, even though its very strong.


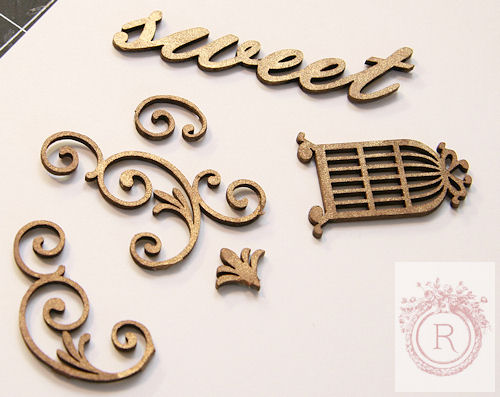
I then applied a very generous amount of glimmermist with a pain brush! It applies a gorgeous, almost burnt glitter effect this way. It was a technique I stumbled actross because my sprayer stopped working and I needed to change the colour of my chipboard. The paint brush works great if you want a nice, even layer.


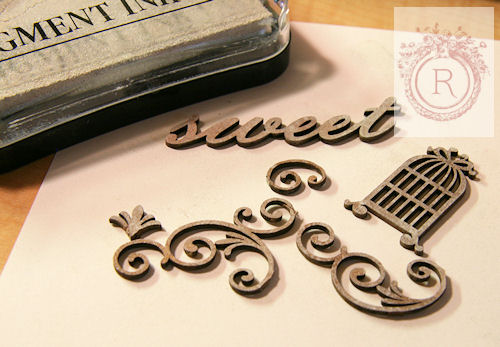
My final step in customizing the chipboard was to take a white inkpad and stamp over the surface, it creates a beautiful chic antique look.


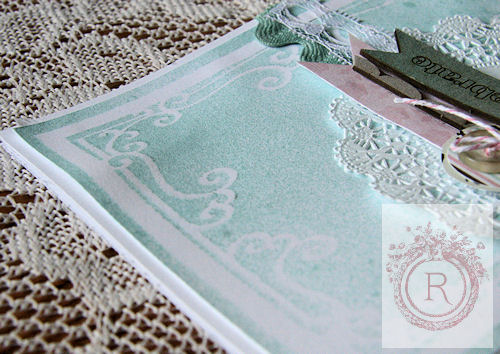
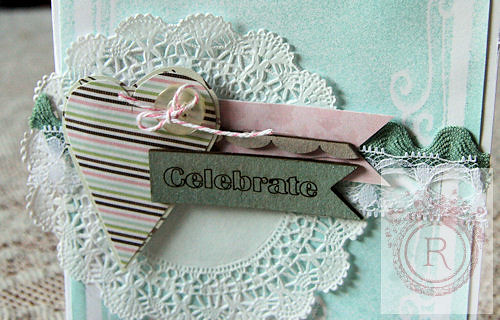
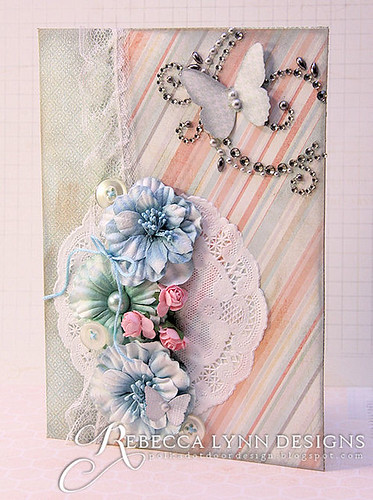
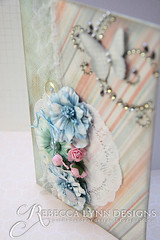
 and here is the finished product on the card.


 Our blog hop runs from Monday 20th May and you have 5 days to do the hop. You must comment on all the blogs for a chance at the Prize's, and return here with your answer to a question hidden on one of our designers blogs. The Winner will be announced here on the 26th May !

The next stop on the blog hop is Julene Mathews so pop on over and leave her some love. Thank you for playing along with our first Blog Hop, we hope that you had fun and will be back to join in again.

 Here is a list and order for our blog hop. 


Good luck Everyone!

Read more...

{Rebecca} Sketchabilities Sketch 89

>> Monday, April 15, 2013

I know I'm a little bit prejudice, but I'm quite convinced that I have the most adorable little girl. I finally printed off some photos and am starting to scrapbook them. Sofia is only 8 months old, but I already feel like she is so big when I look at this photo from her taken at 4 weeks old. She was such a gorgeous little thing and she's grown up so much!

I loved this sketch from Sketchabilities and this may have been the quickest I ever finished a page. It took about an hour. Sometimes I can spend days on a page! But with a sketch like this, it just came together so beautifully.


"I just love this."


Thanks for looking and be sure to take a peak at the beautiful inspiration the rest of the design team has for you!


Read more...

{Rebecca} Memory Maze April DT Reveal

>> Saturday, April 13, 2013


I'm back for with another round of fun cards with Memory Maze products! This month, I have a bit of a fun twist that I'd like to share and highlights the versatility of the product. Every couple of weeks I have some very special young ladies come to my house and we usually spend the afternoon crafting. This month, when I pulled out my supplies they spotted the Memory Maze Stack-Ums and were quite excited to try something new. 
3D Card Stack-Ums


Isn't this a fun card?! I love the chickens and the country feel. There is a bit of fussy cutting, but my 15 year old did a fantastic job with that, and layering the pieces together as well.


These cards were made by my girls, aged 15 down through 5. It just shows you how versatile the Satck-Ums are, whether you are an experienced crafter, or just beginning, they are great starting points for any project! We chose to embellish a few of the cards with a few extras, but for the most part, these are all included with the Stack-Ums when you purchase them.


This last card is made by an adorable 5 year old. She had so much fun cutting this out and putting it together. Isn't this darling?


"A Pirates Life for Me"

Of course I couldn't let the girls have all the fun. I joined in on the action as well with this adorable pirate themed Stack-Um as well as joining it with chipboard from Memory Maze as well. 


I cut 3 pirate layers out and with 3D tape stacked them one atop the other and adhered them to the card. The chipboard was sprayed with glimmer mist and even though its a boy card, I love the way it shimmers.


Memory Maze Products:
Just for You Chipboard
3D Card Stack-Ums 
 

...............................................................


"Happy 6th Birthday"


One last card to share with you all, a fun birthday card for my six year old brother. The chipboard adds a fun dimension and I added another layer by stacking the chipboards. 


I sprayed the chipboard with glimmer mists (again), its such a fun way to dress up the chippies and I can create perfectly matched embellishments for individual projects.


Memory Maze Chipboard: 


Other Materials:
Sassafrass Lass Paper, My Minds Eye Twine, Glimmer Mist


Read more...

{Rebecca} Sketchabilities 88

>> Monday, April 1, 2013

I kept checking my blog this morning, waiting for my post to come live, but then realized that I had forgotten to even schedule a post for today, hence the quick post, because I didn't plan on making a post!

Thanks to another great sketch from Sketchabilities, I have my second page for the wedding album done. This was such a versatile sketch and just perfect for the page I wanted to accompany the first.


My brother and his wife were married at a heritage town so to using the vintage ribbons, buttons, and dictionary pages really helps to tie in the wedding theme to the pages a little.


I also used my Memory Maze chipboard and heavily misted it with some Glimmer Mist. Love the texture it adds to the page!

Be sure to check out the Sketchabilities site, the inspiration from the design team this week is incredible!

Read more...

{Rebecca} Catered Crop : Flower Power

>> Thursday, March 21, 2013

  Love is the flower you've got to let grow.
   ~ John Lennon

I would be lieing if I said the first thing that popped into my head when this challenge was announced wasn't 70's pop music, orange and tie dye, peace and hippies, and VW vans. That was way before my time, but I still have always associated "Flower Power" with the generation that my parents were teenagers in. But of course, since that wasn't my generation, my card has absolutley nothing to do with 70's Flower Power. It took a much more shabby turn.


It has been a while since I crafted anything quite like this, but its a style I love and my pinterest boards are full of inspiration images that are more shabby and chic. I took the opportunity to create a girly card and pulled out my flowers and had a ball!


I can't wait to see what the other designers have created and encourage you to go take a peak, and if you have time, to play along with this challenge. Who doesn't love the prospect of getting to be Catered Crops guest designer? Fun, fun!
I'm so ready for Spring, aren't you? Let's celebrate with some Flower Power. Just include flowers somewhere in your project – as a stamped image, in your pattern paper, or as an embellishment – anyway you choose.


  • Just show us any project using a flower.
  • Include a link to us at Catered Crop or add our button, which you can grab on our sidebar or at our {button gallery}.
  • Link up and link often, but be sure you link up by 8:00 PM EST on Saturday, March 30.
  • Keep the party hopping by visiting the other players and leaving comments.
  • Check back with us on March 31 to see if you've won an opportunity to be a guest designer.

CHALLENGES :

Read more...

{Rebecca} Sketchabilities 87

>> Friday, March 15, 2013

With each sibling that has gotten married, I have added 4 pages to a scrapbook that I started for my Mom. Its been incredibly fun and rewarding project, and promises to be a long running book, as not even half my siblings are married, and the youngest is only 5. One thing I have very much enjoyed about this particular project is that it showcases my evolving style and scrapbooking growth, all in one book, and since it is my Mom's. Once I am done a page, regardless of whether I was fully satisfied with the results, I can't change anything.


There were 4 weddings in the book, and I'm started on the 5th. This is the first page, and I'm sure I will be sharing more with you in the future, especially since there are some gorgeous sketches coming up with Sketchabilities that I know will work perfectly for wedding pages.

I'm quite happy to introduce you to the first of (hopefully) many sketches from Sketchabilities.


Be sure to check out the Sketchabilities website for more great inspiration from the rest of the design team, and for a chance to win a spot as the March Feature Designer!

Read more...

{Rebecca} Memory Maze March DT Reveal

>> Wednesday, March 13, 2013


I had a fantastic time working with the Memory Maze products this month, there is such a range of fun chipboard!

"Its a Girl"


The Memory Maze chipboard was the perfect accompaniment for the baby girl card that I created this month. I went all out with the pink and the brown complimented it perfectly.


The chipboard was the perfect colour already to compliment the pink theme, so I simply added a layer of glitter glue over the entire surface, it absolutely sparkles!  

 
Memory Maze Chipboard: 

Other Materials:
My Minds Eye Paper, Misc Antique buttons, ribbon, dictionary paper, Reflections glitter,

...............................................................

"Have Fun"


How much fun in this little vintage bike? I kept this card simple and tried to make the chipboard the hero hero, something that actually isn't very hard to do. Pairing it with October Afternoon paper made this a perfect duo.

I left the chipboard mostly original, but embellished it with some rhinestones. 


Memory Maze Chipboard: 

Other Materials:

October Afternoon Paper, My Minds Eye Rhinestones and twine, American Crafts rub-ons
I have another project using Memory Maze chipboard to share with you later this month!


Read more...

{Rebecca} Catered Crop : Framed

>> Tuesday, March 5, 2013

I was framed, framed, I was blamed, framed
Well, I never knew nothin, but I always get framed
Oh, framed.
   ~ Framed, sung by Ritchen Valens


My Mom turned 50 this year and I knew that even though she is a huge fan of my cards, this year, that wasn't going to be enough. The older I become, especially now that I have a baby girl, the more I realize all the sacrifices my Mom has made and the love she has poured in my life. I wanted some thing a little more meaningful and lasting to say how much I love her.


So, I took this challenge quite literally and created a "framed" project. Quite conveniently we had a very recent photograph of the entire family from my brothers wedding and created a wall hanging based on Proverbs 31, specifically choosing the verse "and her children shall rise up and call her blessed". 


This (bi)week at Catered Crop, we want to see you frame your focal point or frame your project – just include a frame somewhere in your project. 

  • Just show us any project using a frame or mat.
  • Include a link to us at Catered Crop or add our button, which you can grab on our sidebar or at our {button gallery}.
  • Link up and link often, but be sure you link up by 8:00 PM EST on Saturday, March 16.
  • Check back with us on March 17 to see if you've won an opportunity to be a guest designer.


Read more...

{Rebecca} Catered Crop Star Bright

>> Monday, February 18, 2013


For my part I know nothing with any certainty,
but the sight of the stars makes me dream.
   ~ Vincent Van Gogh


I knew right away that stars were going to len themselves perfectly for a baby boy card that was on my "to make" list. I love it when my commitments and my other to do lists coordinate so nicely!


SUPPLIES
My Minds Eye Paper, buttons
American Crafts Thickers, Floss
 Misc Ric Rac, buttons,

You have until March 2 to link up with this fun challenge! Be sure to check out the Catered Crop blog for more inspiration and all the details.

Challenges
Catered Crop : Star Bright
Paper Players : Buttons and Bows for Baby

Read more...